Note: The information in this article applies to Team Foundation Server 2010.
Now that the Build Service is available for your DiscountASP.NET Team Foundation Server 2010 account, there are some additional steps that you'll need to perform before actually creating a Build Definition.
First, you'll need to verify whether or not your user account has the ability to create a Build Definition. If your user is already a Project Collection Administrator, you can skip over this part but for other configurations, you'll need to add a user as either a Project Collection Build Administrator or as a Builder at a Team Project level.
To add a user as a Project Collection Build Administrator, access the
Global Groups tool and then click on the "View/Edit Members" link for the "Project Collection Build Administrators" group, check the box next to the user and then click on the "Save" button.
To add a user as a Builder, Access the
Project Groups utility, select the Team Project that the user has access to, click on the "View/Edit Members" link for the "Builders" group, check the box next to the user and then click on the "Save" button.
Next, we'll need to make sure that the user has the ability to access the FTP server. Head over to the
Build Manager and make sure that the user has either "read only" or "read and delete" access.
At this point, it would be good to configure your preferred FTP client. Please note that we only support FTP over SSL for security purposes so you'll need to use a compatible client application. If you need help configuring your FTP program, check the
FTP client configuration section of the DiscountASP.NET TFS Knowledge Base.
Now, you're all set to create a Build Definition.
Connect to your Team Foundation Server and then from the Team Explorer window, expand your Team Project Collection and then locate your Team Project.
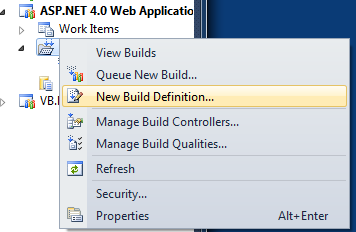
Right-click on "Builds" and then click on the "New Build Definition" menu option to start the wizard.
From the new window that opens, you'll be supplying values for the actual Build Definition.
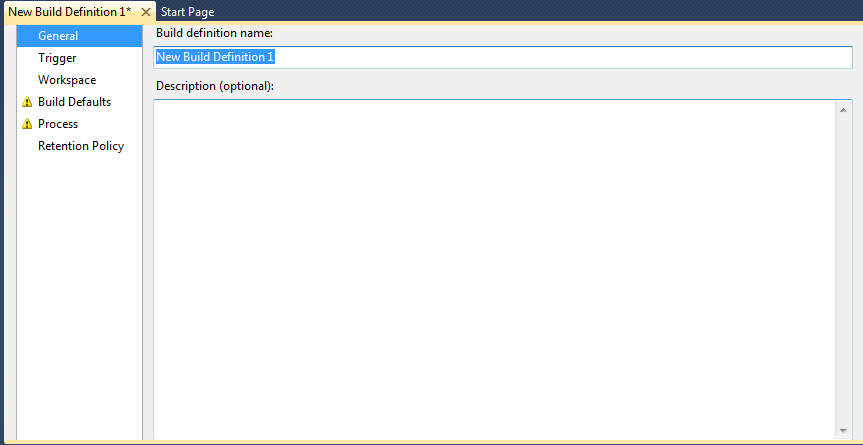
Under General, provide a name for your Build Definition.
Click on Trigger and then select an option that suits your needs.
Now, click on Workspace and and make sure that the correct folders are active. It should be the path to your Team Project and the Build Agent Folder should be set to $(SourceDir).
Next, click on Build Defaults. You will need to provide a drop folder location. You can find the drop folder path under the
Build Manager in your DiscountASP.NET TFS Control Panel.
Click on Process and you will need to select either the Solution or Project file. On the Items to Build line, click on the "..." button. From the dialog box that becomes available, click on the "Add" button and then locate your solution/project file.
Review the Retention Policy settings as you may want to modify the default settings.
From the File menu, click on "Save New Build Definition" or just click on the save button in the Visual Studio toolbar.
After a successful Build, connect to your FTP server to obtain the files.
On the Build Definition, one thing to note is that there are a couple of options available that will not work in our implementation of Team Foundation Server 2010. The "Open Drop Folder" and "View Log" features will not work and result in a "TFS42004: Team Build failed to open folder 'path.' The network name cannot be found." and "TF225002: Unable to find specified file." respectively. The reason why they will not work is because the UNC path (\\SERVER\SHARE) that's specified will not work over the Internet as it's primarily intended for local area network environments. As a workaround, you can access the files through FTP.