Note: The information in this article applies to Team Foundation Server 2012.
Note: There is also a Getting Started video available
here.
1. Once your account has been established, you’ll need to create a user. Access the
Manager Users utility in the DiscountASP.NET TFS Control Panel, supply a user name and enter the password that you'd like to use and then click on the "Add" button.
2. The next step is to add the user that you've created to a global group
which is required so that you can create a Team Project within your Team
Project Collection. Access the
Global Groups tool, click on the "View/Edit Members" link, select the user that you created in the previous step and then click the "Save" button.
3. You’ll need to configure Visual Studio 2012 to connect to your Team
Foundation Server 2012 server and if you haven’t already, please follow
the steps available in the
Visual Studio 2012 Installation and Configuration guide.
4. Access the Team Explorer window. If it's not already visible, from the View menu, click Team Explorer.
5. Click Create a New Team Project to start the New Team Project wizard and then create a Team Project.

6. Next, open the local version of your Visual Studio 2012 Project or Web
Site and then switch to the Solution Explorer window. If the Solution
Explorer window is not visible, click on the View menu and then click on
Solution Explorer.
7. From the Solution Explorer window, right-click the Visual Studio 2012
Project or Web Site and then click the Add Solution to Source Control
Option.
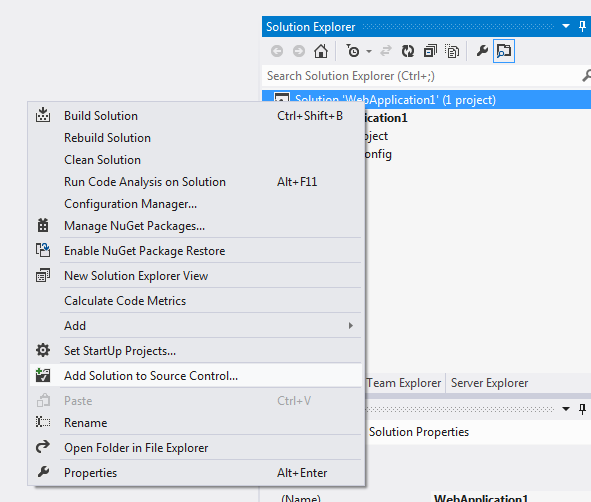
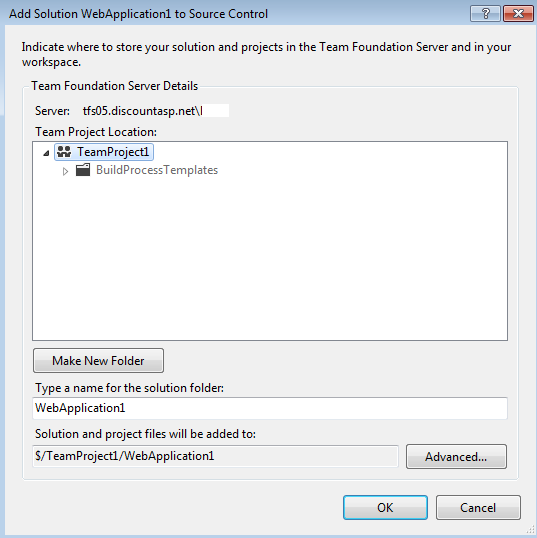
8. From the Add Solution window, select the Team Project that was created and then click the OK button.
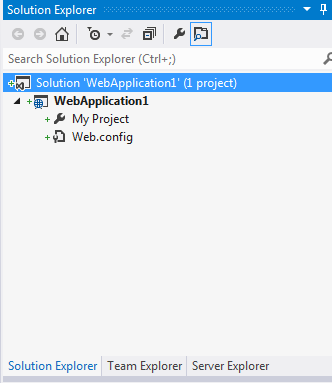
9. In the Solution Explorer window, you’ll see that the files that were added are denoted by a green plus symbol.
10. Since a new Team Project is involved, you’ll need to perform a check-in.
To check your files in, click on the View menu, click Other Windows and
then click Pending Changes.
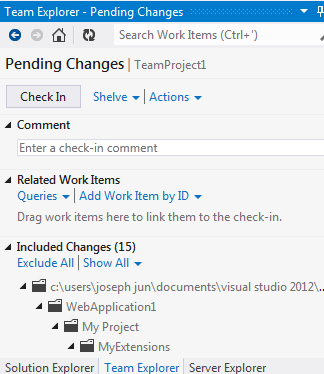
11. You can click the Show All option under Included Changes to confirm that all of your files will be checked-in.
12. Now, click the Check In button to begin uploading files to the server.